Soundboard and Back Construction…


The soundboard on a guitar is that part to which the guitar strings are pinned via the bridge and which contains the guitar’s sound hole and rosette. The back is — well — the back of the guitar. Both the soundboard and back consist of two pieces of wood that have been created by splitting a single piece of quarter sawn wood in half to create two “bookended”, or symmetrically grained, pieces. These two pieces are joined together with glue to form one larger single plate.
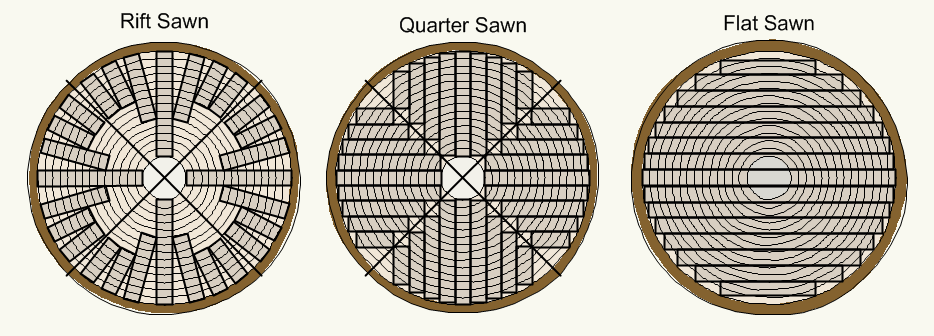
Quarter sawn wood is produced by cutting logs first into 4 quarters and then cutting those wedges perpendicular to the annual, or growth, rings on the wedge’s centerline. By cutting the wood in this way, the cells that carry water and nutrients from the center of the tree outward, known as Medullary Rays, are closely parallel to the faces of the boards cut while the annual rings run closely perpendicular to the face; only the board cut along the centerline of the wedge is truly parallel and perpendicular. The result is a board whose response to variable internal moisture content, primarily caused by changes in humidity, is to shrink or expand only in its thickness. This results in wood that is more dynamically stable and responsive than it would be if flat cut, the more common, easier, cheaper and less wasteful method used for cutting boards from logs. Additionally, there is Rift sawn wood that results in boards that are all cut perpendicular to the annual rings and parallel to the Medullary Rays, however it is a more time consuming process than quarter sawing and results in greater waste making the boards more expensive and as a result is rarely produced.
The most common wood used in a guitar soundboard is spruce. There are approximately 35 different species of this coniferous evergreen tree in the world. The most common species used are Sitka spruce, Adirondack spruce (also known as Red spruce), Engelmann spruce and European spruce. To a lesser degree, soundboards are also made from woods like cedar and redwood. All of these softwoods have a very high strength to weight ratio, which allows the soundboards made from them to be thin and light but still, in combination with interior bracing, very strong. This is important when considering that the strings pinned to the soundboard may exert as much as 200 pounds of tension on the soundboard when using steel strings.
The back may be made from either hardwood or softwood, though it is more typically made from a hardwood. The specific wood species used for the back and sides acts as a filter, emphasizing or de-emphasizing the sound frequencies generated by the soundboard. For example, Mahogany will yield a warmer sound with harmonic complexity while Maple will be brighter and have tonality that is less complex.
The soundboards and braces for the two guitars I’m currently working on are being made from FSC certified Red spruce, from Nova Scotia. The back and sides for the Jumbo guitar are reclaimed Douglas Fir, a softwood, from Oregon. The back and sides for the Tenor guitar are Koa, an evergreen hardwood native to Hawaii.
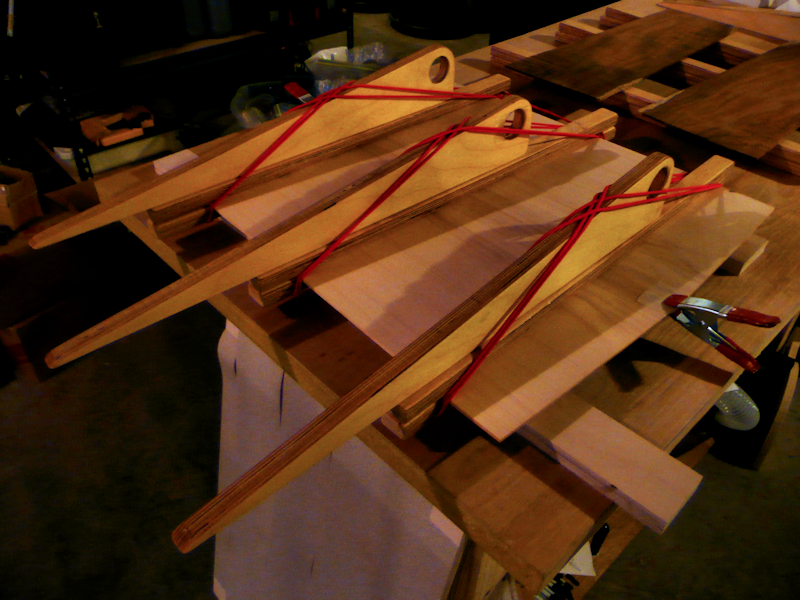
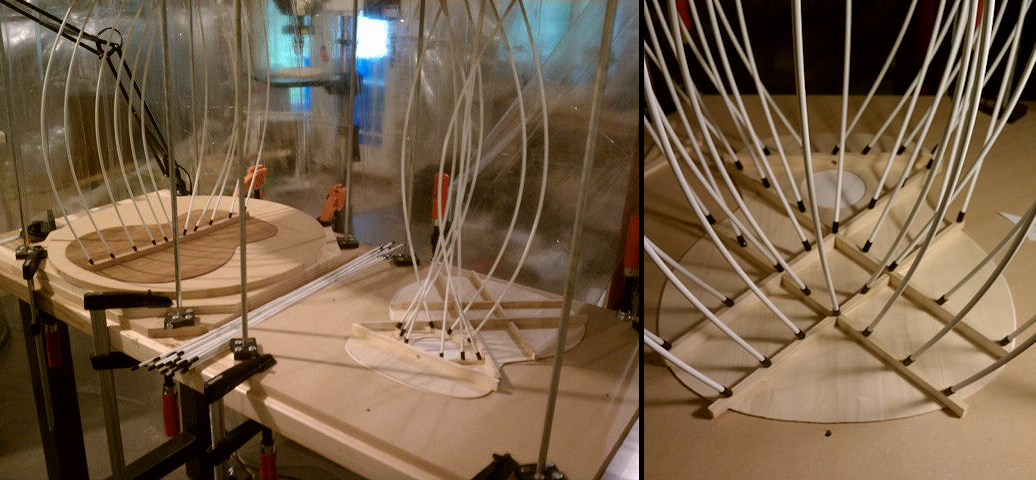
For both the soundboard and the back, the two separate pieces are initially thinned to approximately 0.157” (4mm) and then the two edges to be glued to each other are jointed with a router on a jig. The pieces are then glued together and clamped. There are many clamping methods that may be used. I employ a simple method using what is known as Spanish clamps. Spanish clamps consist of a set of flat sticks between which the two pieces are placed, rope looped around the sticks to hold the pieces together and then wedges inserted under the ropes to pull the two pieces of wood tightly against each other. When completely dried, the glue joint is scraped clean of any glue squeeze out. The joined piece is then reduced to its final thickness, which, depending on the species of wood, size of guitar and type of strings used, may be anywhere from 0.080” (2mm) to .120” (3mm) for the soundboard and 0.085” (2.15mm) to 0.110” (2.8mm) for the back.
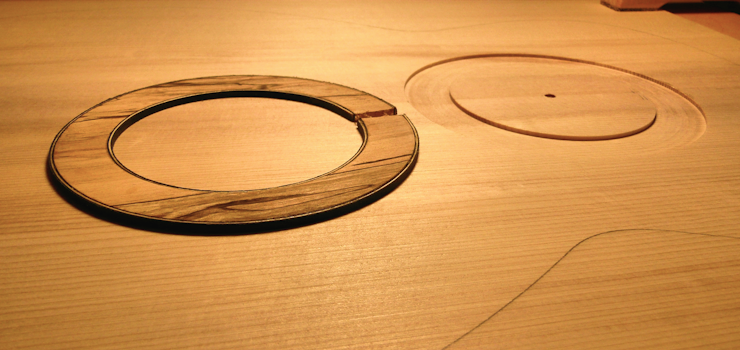 The guitar pattern is traced onto the soundboard, the location of the sound hole is marked on the outside face and a circle cutting jig and small router are used to cut the channel into which the rosette will be inlaid. Glue is spread evenly throughout the channel and using a veneer roller the rosette is firmly seated in the channel. Excess glue is wiped away from the surface and then a piece of wax paper is placed over the rosette over which a large caul is clamped to hold the rosette down firmly while drying.
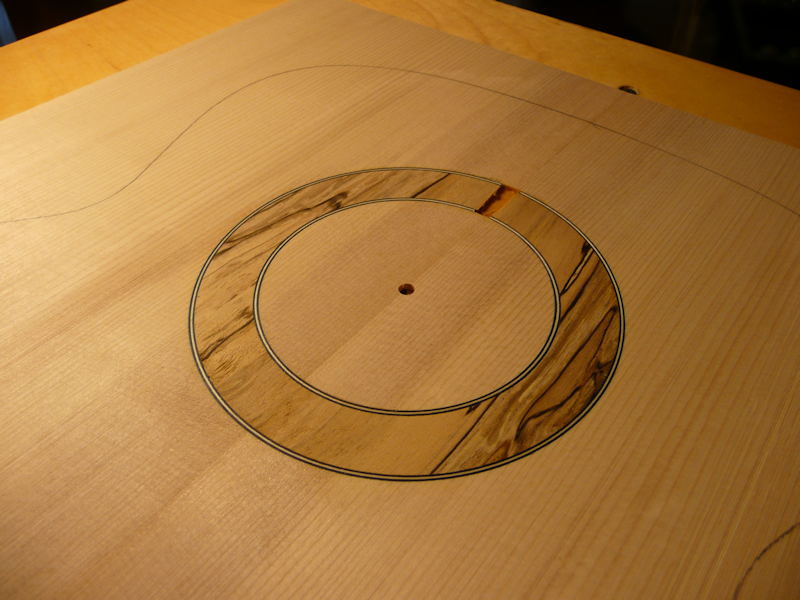 After the glue has completely dried, the portion of the rosette that protrudes above the soundboard is carefully scraped down flat with the surface of the soundboard. The same circle cutting jig is used again to then cut the sound hole. The soundboard is then cut along the pattern line on the band saw.
The guitar pattern is then also drawn onto the outside face of the back. As the back will be curved, the back is cut approximately 0.250” outside the pattern line to provide the extra material necessary.
The location of the braces is marked on the inside face of the soundboard and quarter sawn spruce for the braces is roughly cut to size. The 2 sets of X-braces used in the bracing pattern shown are joined together with a lap joint individually and then to each other in the same way. After ensuring that the structure is flat by sanding the bottom of it, glue is applied to the braces and they are clamped into position on the soundboard using Go sticks, flexible rods, inside of a Go deck. This method allows even pressure to be applied across the many small surfaces to be glued. When the glue has dried completely, the braces are then carved to thin them on the outer edges of the soundboard, allowing the soundboard to be more responsive.
Similarly, a center brace and 3 cross braces are created and glued to the inside of the back while the back is supported in a radius work dish on the Go deck. The cross braces are also thinned towards the outside of the back.
A bridge plate is cut, fitted and glued at the location of the bridge and an edge graft is glued along the soundboard joint at the bottom end.
The soundboard and back are now ready for the assembly stage when the guitar’s sides will be glued to each plate.